How to use gitlab pipelines to deploy to kubernetes (running on OVH) 30 Jul 2018
Hello everyone,
It could be interesting for you to have a look at how to deploy a Kubernetes cluster on OVH before reading this article.
Disclaimer
This article is not intended at describing continuous delivery to a production environment. My goal is to show you the basics of gitlab pipelines. To do so we will be “continuously” deploying a Nodejs app to a kubernetes cluster.
Gitlab has recently launch an “auto-devops” feature, it is very interesting and serves as a base of this article, you can find the complete auto-devops pipeline template here. Unfortunatly this feature is really intended for people hosting their app inside google cloud right now (see related issues). Plus I would like to go into the details and unveil the magic being this auto-devops feature :P.
Last but not least, many of the things I will show here could be done differently using other tools like simple npm scripts for example. This is up to you to find the best options for you based on your needs and budget (running jobs has always a cost, at least for our planet).
The goal
I want execute the sequence of actions. I think they are quite self-explanatory so I will not detail them. Again the idea here is not to define a pipeline ready for production but to detail how gitlab pipelines work and can be used to deploy on Kubernetes.
| Bundling & static analysis | Test | Build | Deploy |
|---|---|---|---|
| Bundle & analyze the code (lint etc.) | Tests | Build new docker image | Deploy on Kubernetes |
In the .gitlab-ci.yml it would looke like This
stages:
  - bundle
  - test
  - build
  - deploy
Prerequisites
- A node js web application (like this one)
- A kubernetes cluster (how to deploy a Kubernetes cluster on OVH)
- A docker hub account an a public repository
Creating the jobs
Bundle & static analyzis
I want to use static analysis to enforce as much as possible the quality of the code. As I am using a javascript project, the tools are not as powerfull as what you can find in a statically typed language like Java but they are pretty good now.
Here, I am simply going to lint my code with eslint. You could also have have a look at flow. And to do so I am just going to use my module bundler (Rollup.js) and define eslint as one of the plugin.
I am also going to uglify the frontend code to limit the size of the downloaded script. Again I am simply using rollup plugins to do so.
Rollup.js is out of the scope of this article so I will not go into the details of my rollup configuration to keep this article as short as possible. But here is how the rollup plugin section looks for the frontend code.
plugins: [
    eslint({
        configFile: ".eslintrc-frontend.json"
    }),
    uglify()
]
In addition to that inside my package.json, I have created a “build” script that will call rollup to analyze and bundle the code.
"build": "npm run _buildBackend && npm run _buildFrontend",
"_buildBackend": "rollup -c ./rollup.backend.prod.js",
"_buildFrontend": "rollup -c ./rollup.frontend.prod.js",
All I need to do inside my gitlab job is to run this script. To do so I need to be inside an environment where node (& npm) is installed. So I chose a node:alpine linux docker image. I also need to install my project first to retrieve all my dependencies etc.
My “bundle” job looks like this now inside the .gitlab-ci.yml
bundle:
    image: node:alpine
    stage: bundle
    script:
        - npm install
        - npm run build
Test
Test is as easy as the previous job. Note that I am coding everything using es6 syntax so I have to transpile everything to be able the run the tests in node. This part is out of the scope of this article. You can find many articles on the subject right now. And no, IMO Node does not really support es6 just yet (as of July 2018) even with the experimental flags…
Inside my package.json.
"test": "npm run _transpileTest && mocha",
"_transpileTest": "npm run _transpileFrontendTest && npm run _transpileBackendTest",
"_transpileFrontendTest": "rollup -c ./rollup.frontend.test.js",
"_transpileBackendTest": "rollup -c ./rollup.backend.test.js",
My “test” job looks like this now inside the .gitlab-ci.yml
test:
    image: node:alpine
    stage: test
    script:
        - npm install
        - npm test
Build
Now comes the real stuff, we want to create a docker image containing our node js app, deploy it to docker hub so that it can be used by Kubernetes to be deployed. To do so we are going to use a docker image containing docker to be able to launch docker commands.
The rest is pretty simple, simply login, build then push your image.
build:
  image: docker:stable
  stage: build
  services:
    - docker:dind
  script:
    - docker login -u "$CI_REGISTRY_USER" -p "$CI_REGISTRY_PASSWORD" $CI_REGISTRY
    - docker build --pull -t "$CI_REGISTRY_IMAGE" .
    - docker push "$CI_REGISTRY_IMAGE"
  only:
    - master
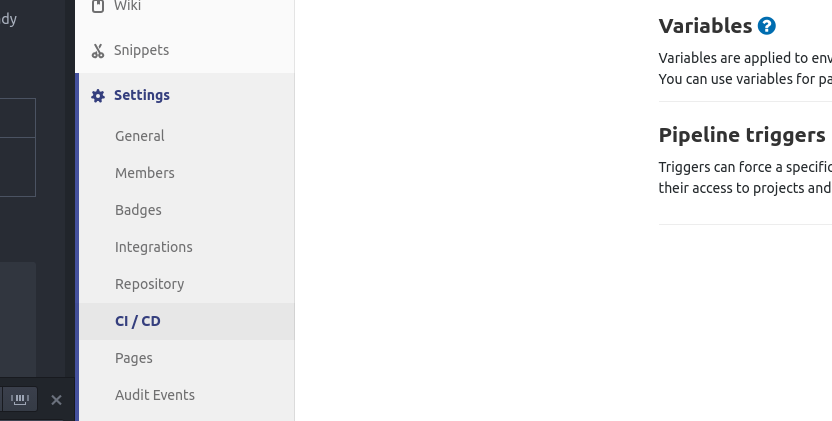
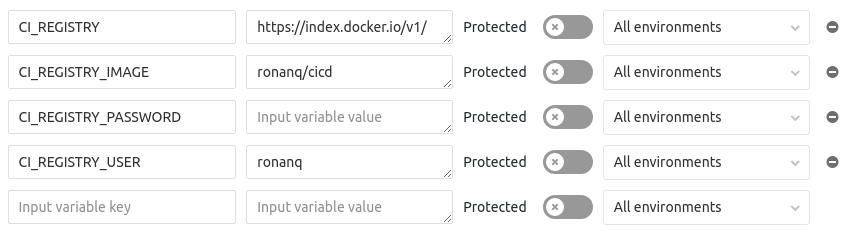
After that you just need to set the environment variables inside gitlab as shown below.
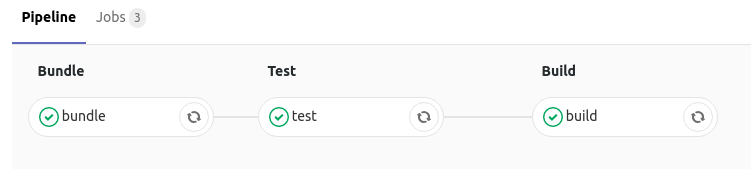
After this stage you should have a successfull pipeline on gitlab
Deploy
Now we want to deploy our image on our Kubernetes cluster. The first step is to manually deploy it and create an associated service to expose it to the internet.
Let’s create this deployment & service inside Kubernetes that will point to our docker image inside docker hub. I am going to use the “default” namespace, as I do not want to go into too much kubernetes details. Same thing for the associated service, I will try to make the service yaml as short as possible to ease the reading and understanding. How to configure services inside Kubernetes is out of the scope of this article.
The only interesting part is that we are using a NodePort service to be able to expose our service externally and that I am pointing to the port 5000 which is hardcoded inside my node application as the port exposed by express.js. The rest is completly basic and standard.
# ------------------- Deployment ------------------- #
apiVersion: extensions/v1beta1
kind: Deployment
metadata:
  name: cicd
  namespace: default
  labels:
    app: cicd
spec:
  replicas: 1
  selector:
    matchLabels:
      app: cicd
  template:
    metadata:
      labels:
        app: cicd
    spec:
      containers:
      - name: cicd
        image: ronanq/cicd:latest
        imagePullPolicy: Always
        ports:
        - containerPort: 5000
          name: web
          protocol: TCP
---
# ------------------- Service ------------------- #
apiVersion: v1
kind: Service
metadata:
  annotations:
  labels:
    app: cicd
  name: cicd
  namespace: default
spec:
  ports:
  - protocol: TCP
    port: 5000
    targetPort: 5000
  selector:
    app: cicd
  type: NodePort
Save this into a file then use kubectl create -f <yourfile.yml> to create the deployment and service. Once deployed, to retrieve the service port you can simply get your services using:
$kubectl get services

NAME         TYPE        CLUSTER-IP       EXTERNAL-IP   PORT(S)          AGE
cicd         NodePort    10.105.170.242   <none>        5000:31238/TCP   5m
You can see that cicd pod is exposed on port 31238. To access my service from the internet I simply browse to the following url where nodeIp is the ip of any of your node:
http://<nodeIp>:<NodePort> in my case NodePort = 31238 as shown above.
The second part is to trigger a rolling upgrade of our service when a new image is available. To do so there are many options.
One solution could be to use a cron job on a specific pod with the appropriate credential. Nevertheless be carefull when updating your production environment with a new image. This operation should probably be done manually to avoid pulling a bad image.
Another one would be to use gitlab and try to trigger this rolling upgrade from there. By loggin to the master node and access the kubernetes api this should be possible (again I am not concerned by security issues in this article).
I will try to update this article with an example of how to automate the rolling upgrade when a new image become available but feel free to contribute in the comments
How to do a rolling upgrade inside Kubernetes:
Few notes
- Yes I know I my docker image should only used the uglified and packaged javascript files instead of copying everything and re-building before starting it …
Hope this will help someone :)